Hello everyone, Welcome to our blog
you are reading this meaning you want to know how to get free hosting for your website to make it live on your domain. So for that, we have something to show you how you can do that. There is a website called Netlify.com which gives free hosting for static websites.
On the Netlify.com you can deploy your website with a postfix like netlify.com or with your own domain name
example: like your company name is the web universe so it gives you some options to choose a domain with postfix thewebuniverse.netlify.com or you can add a purchased domain in that or you purchase instant on the Netlify.com like thewebuniverse.in
I will explain step by step for the same:

In the image here you can see that you can signup with Github, GitLab, Bitbucket, and with your email. For now, I am showing you from Email but I will write a separate blog for others like how we can directly deploy our Github, GitLab, Bitbucket repositories on the Netlify.com
Netlify sends a mail to the Email account to verify the email account so now go to your email account and check the inbox you will find a mail from netlify.com

To verify that just click on verify button it will take you on the log in page of netlify.com so login now
with your email and password
Step 3: When you will log in then the landing page looks like below screen. Here you can see many options like Sites, builds(direct use from GitHub, GitLab), domain, members(to add your team members), billing(for some extra features), and you can see a box in the middle with the

Now drop the folder which contains all these files into the box and in just a few seconds your site will be live on a temporary domain (default domain).
example:
As you can see in the bottom circle your site is published and in the top circle website domain name will be displaying

1. The first option is you can edit your site domain name and choose your choice name if available with postfix netlify.app like I write my own name thewebuniverse and just down there you can see the full name of your website.

2. The second option is you can choose your purchased domain name here if you purchased your domain name then you can add that name or you can purchase domain name here as well.

here you can add that domain name but this is also a long process so I will write another blog for that so you can do step by step otherwise this blog will become a mess and I don't want that
example: you can see the my site which is live now with the above-selected domain name
https://thewenuniverse.netlify.app/

So these are the steps you can follow to make your website live
Conclusion: So Conclusion is that if you want to test your site live please do it for testing you can do it here for free or later if you want to change the domain you can do that also in netlify.com
If you find helpful please like and follow for more blogs like it
And if you faced any other problems please comment that
I will post two more blogs about "How to add custom domain" and "how to deploy Github repository on netlify.com" ....................................................Thankyou for reading
you are reading this meaning you want to know how to get free hosting for your website to make it live on your domain. So for that, we have something to show you how you can do that. There is a website called Netlify.com which gives free hosting for static websites.
On the Netlify.com you can deploy your website with a postfix like netlify.com or with your own domain name
example: like your company name is the web universe so it gives you some options to choose a domain with postfix thewebuniverse.netlify.com or you can add a purchased domain in that or you purchase instant on the Netlify.com like thewebuniverse.in
I will explain step by step for the same:
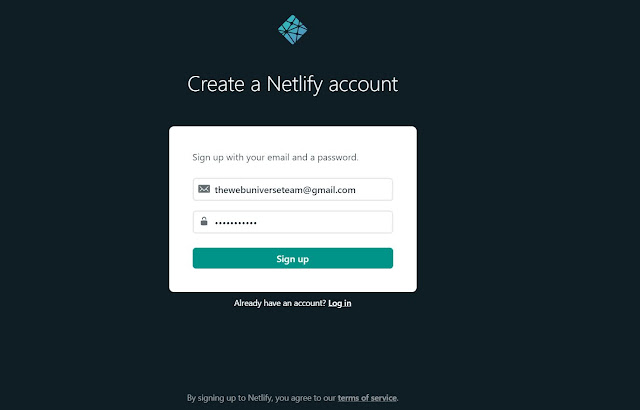
Step 1: Signup on the website netlify.com

In the image here you can see that you can signup with Github, GitLab, Bitbucket, and with your email. For now, I am showing you from Email but I will write a separate blog for others like how we can directly deploy our Github, GitLab, Bitbucket repositories on the Netlify.com
Step 2: When you click on the Email button you will land on the Signup screen so just write your Email and password, and hit the signup button then you will be land on the email verification screen.


To verify that just click on verify button it will take you on the log in page of netlify.com so login now
with your email and password
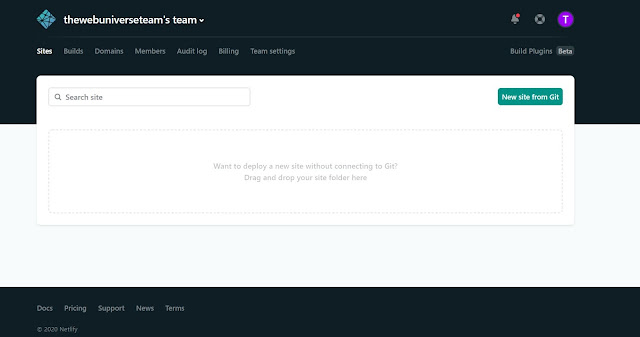
Step 3: When you will log in then the landing page looks like below screen. Here you can see many options like Sites, builds(direct use from GitHub, GitLab), domain, members(to add your team members), billing(for some extra features), and you can see a box in the middle with the
text "Want to deploy a new site ".
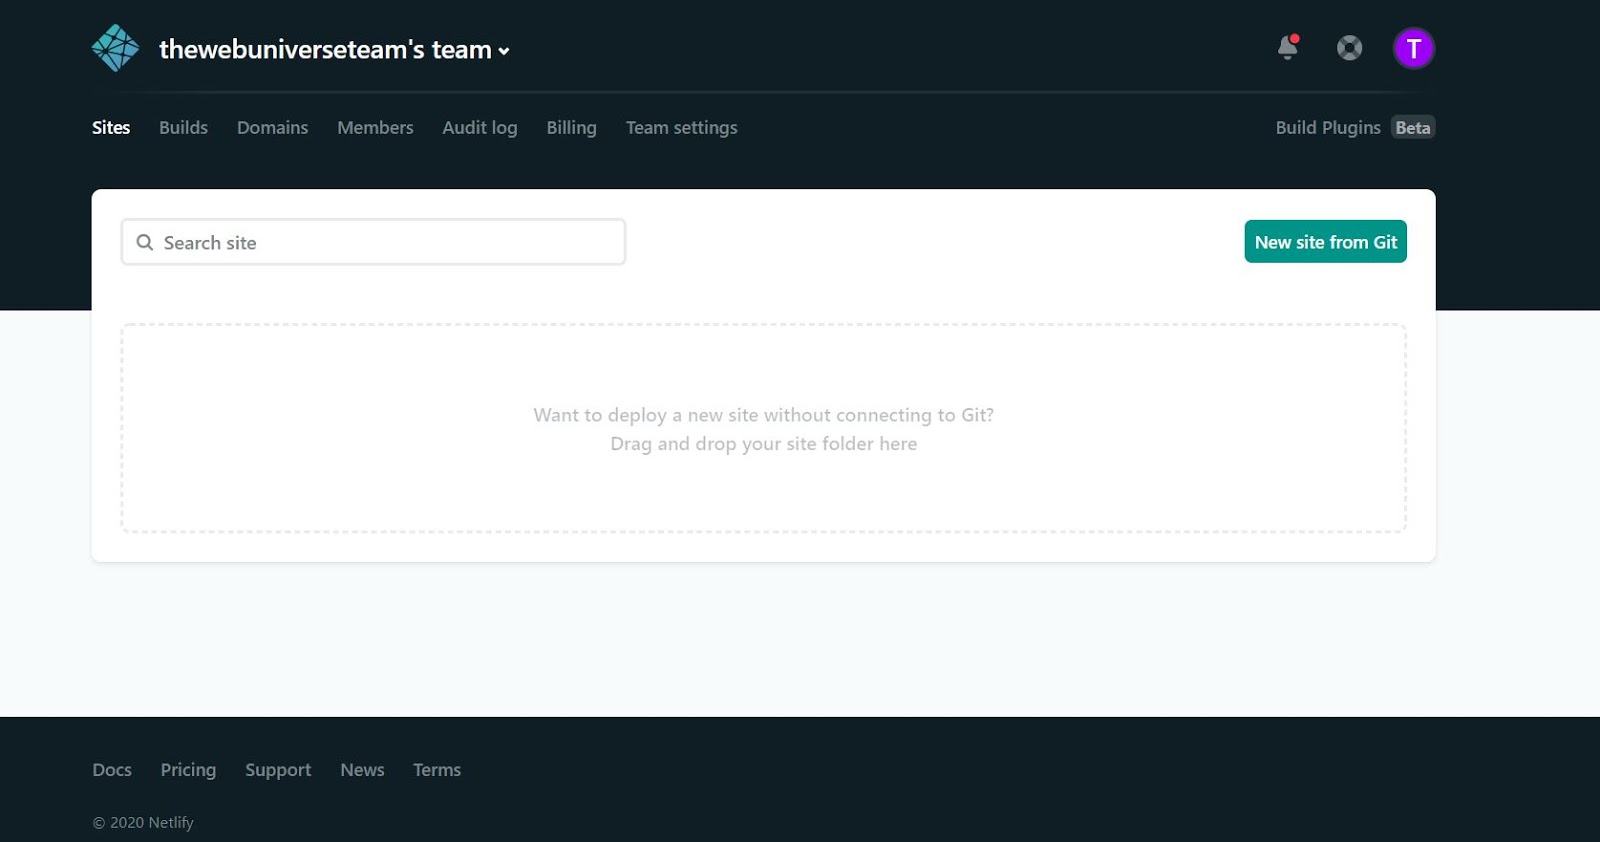
Step 4: Now you have to upload your website folder to this box by just drag and drop thing
Note: The website folder must contain an index.html to load the homepage for your website like the below folder

Now drop the folder which contains all these files into the box and in just a few seconds your site will be live on a temporary domain (default domain).
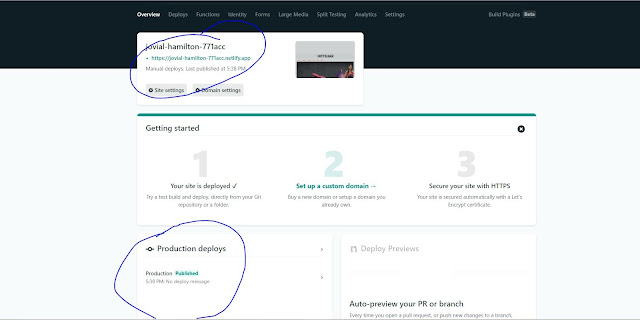
example:
As you can see in the bottom circle your site is published and in the top circle website domain name will be displaying
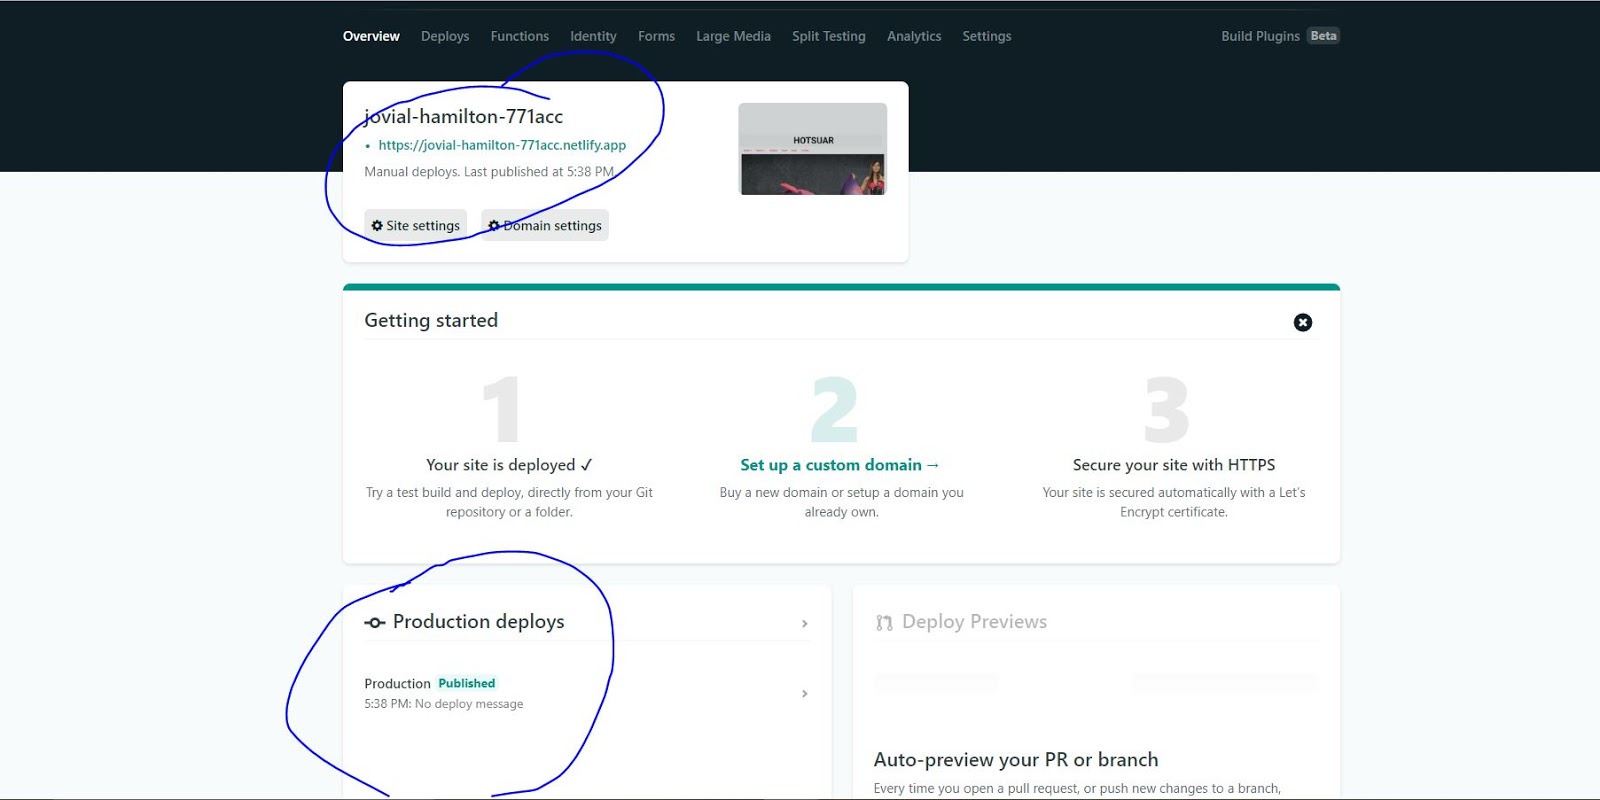
Step 5: Now you want to change your website domain name for that you have to click on the domain setting and there you will have 2 options as you can see in the circle

1. The first option is you can edit your site domain name and choose your choice name if available with postfix netlify.app like I write my own name thewebuniverse and just down there you can see the full name of your website.

2. The second option is you can choose your purchased domain name here if you purchased your domain name then you can add that name or you can purchase domain name here as well.

here you can add that domain name but this is also a long process so I will write another blog for that so you can do step by step otherwise this blog will become a mess and I don't want that
Step 6: Now your site has been deployed on your own selected domain name with postfix netlify.app.
So just type your domain name in any browser and you can see your website is live nowexample: you can see the my site which is live now with the above-selected domain name
https://thewenuniverse.netlify.app/

So these are the steps you can follow to make your website live
Conclusion: So Conclusion is that if you want to test your site live please do it for testing you can do it here for free or later if you want to change the domain you can do that also in netlify.com
If you find helpful please like and follow for more blogs like it
And if you faced any other problems please comment that
I will post two more blogs about "How to add custom domain" and "how to deploy Github repository on netlify.com" ....................................................Thankyou for reading
Comments
Post a Comment